P3 LED display maintenance checklist matters for LED display owners, venue technicians, integrators, and procurement teams because maintenance decisions require a dated symptom record, safe isolation, component-level evidence, compatible spares, and a return-to-service test. The useful answer begins with the exact situation, not with a broad claim that could fit any page.
The first pass should compare module condition, power and signal path, and temperature evidence. Those checks keep P3 LED display maintenance checklist grounded in something a reader can verify, repeat, or discuss with another person.
This article keeps P3 LED display maintenance checklist narrow: it gives a quick answer, a structured facts table, practical checks, examples, and boundary notes so the reader can decide what to review next inside LEDP3 without confusing the article with a tool, product, or broad archive page.
What Is a P3 LED Display Maintenance Checklist?
Quick Answer
A useful P3 LED maintenance record links each symptom to a cabinet position, power or signal path, module batch, temperature reading, corrective owner, and acceptance test.
For P3 LED display maintenance checklist, the safest approach is to compare the main facts, test one concrete example, and stop before replacing modules before tracing power and signal turns a useful answer into a weaker one.
Basic Facts
7 Key P3 LED Display Maintenance Checks
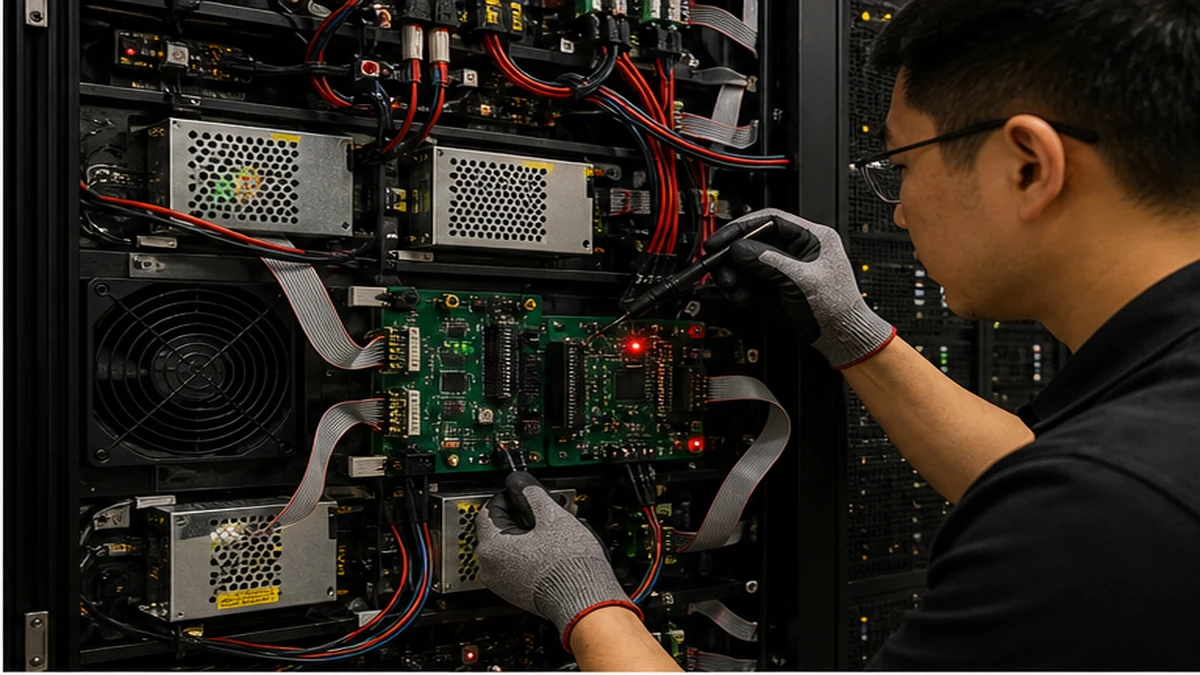
1. Inspect Modules, Power, Signal, and Cooling
Start with the cabinet map and record the exact row, column, module position, symptom, and time observed before touching hardware. The checkpoint here is module condition, supported by a cabinet map.
Trace power and signal paths separately because a dark area can come from a supply, cable, receiving card, connector, or module. Compare power and signal path with temperature evidence before replacing a component.
Compare module batch, calibration data, brightness, and color before installing a spare that may look different after power-up. Avoid replacing modules before tracing power and signal; it weakens diagnosis and acceptance evidence.
Photograph thermal readings, status indicators, cable seating, and test patterns so the repair decision has dated evidence. For P3 LED display maintenance checklist, keep this boundary: Follow installed-system documentation and site electrical, structural, access, and anti-static safety rules; qualified personnel must handle hazardous work.
2. Map Symptoms to Components Before Replacing Parts
Compare module batch, calibration data, brightness, and color before installing a spare that may look different after power-up. The checkpoint here is power and signal path, supported by a test-pattern record.
Photograph thermal readings, status indicators, cable seating, and test patterns so the repair decision has dated evidence. Compare temperature evidence with spare compatibility before replacing a component.
Assign an owner and impact level to each defect instead of letting intermittent faults disappear into an informal message thread. Avoid mixing incompatible spare batches; it weakens diagnosis and acceptance evidence.
Clean ventilation paths and inspect fans with the system isolated according to site procedures; heat evidence belongs in the maintenance log. For P3 LED display maintenance checklist, keep this boundary: Follow installed-system documentation and site electrical, structural, access, and anti-static safety rules; qualified personnel must handle hazardous work.
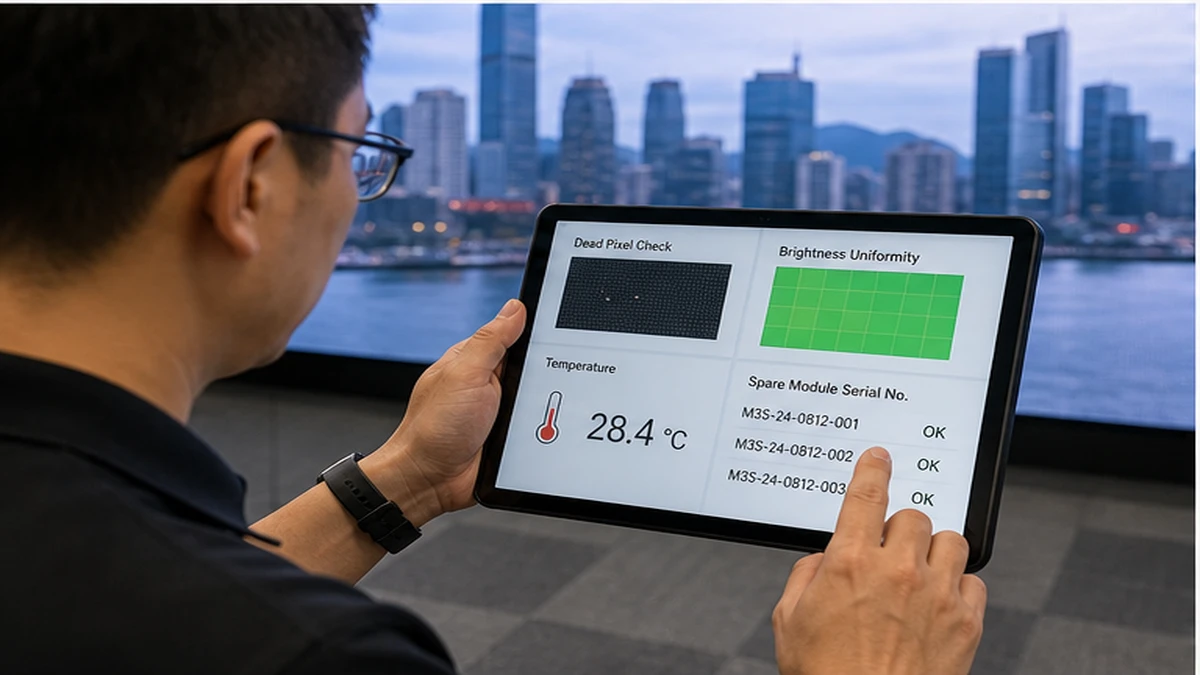
3. Record Dead Pixels, Uniformity, Temperature, and Serial Numbers
Assign an owner and impact level to each defect instead of letting intermittent faults disappear into an informal message thread. The checkpoint here is temperature evidence, supported by a thermal comparison.
Clean ventilation paths and inspect fans with the system isolated according to site procedures; heat evidence belongs in the maintenance log. Compare spare compatibility with acceptance test before replacing a component.
Run uniformity, signal stability, content playback, and temperature checks before returning the wall to service. Avoid skipping temperature evidence; it weakens diagnosis and acceptance evidence.
Keep hazardous electrical, structural, access, and anti-static work with qualified personnel following installed-system documentation. For P3 LED display maintenance checklist, keep this boundary: Follow installed-system documentation and site electrical, structural, access, and anti-static safety rules; qualified personnel must handle hazardous work.
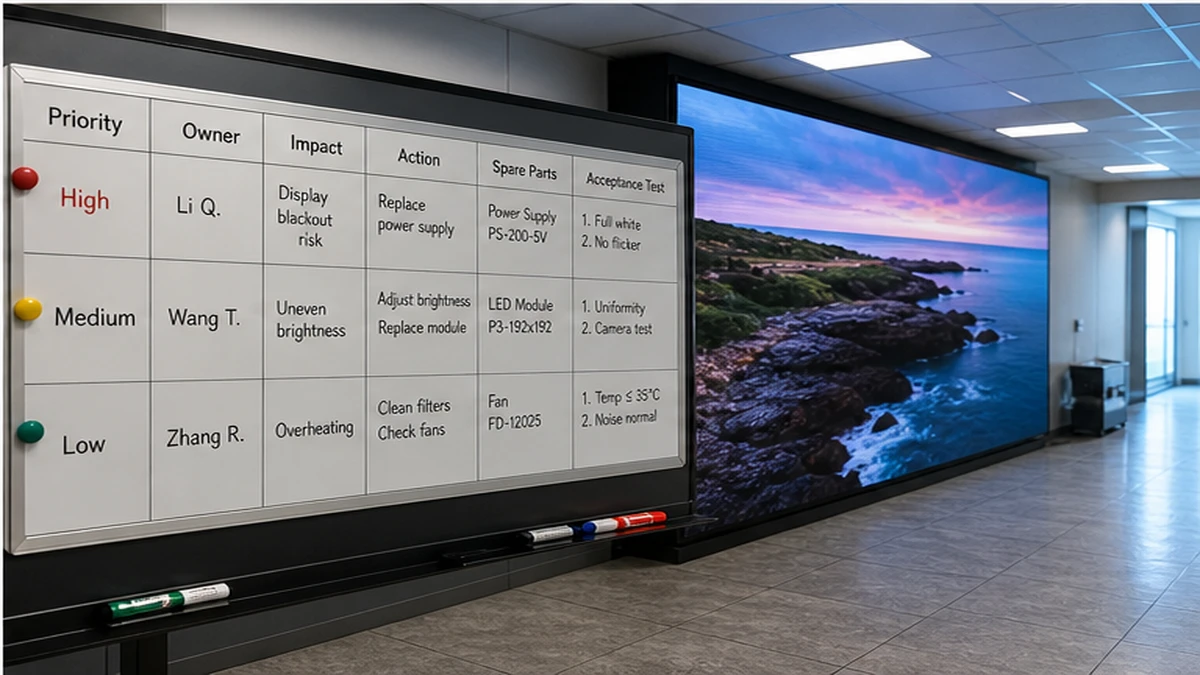
4. Build a Spare-Parts and Owner Queue
Run uniformity, signal stability, content playback, and temperature checks before returning the wall to service. The checkpoint here is spare compatibility, supported by a spare-module log.
Keep hazardous electrical, structural, access, and anti-static work with qualified personnel following installed-system documentation. Compare acceptance test with safety boundary before replacing a component.
Start with the cabinet map and record the exact row, column, module position, symptom, and time observed before touching hardware. Avoid returning the wall to service without acceptance tests; it weakens diagnosis and acceptance evidence.
Trace power and signal paths separately because a dark area can come from a supply, cable, receiving card, connector, or module. For P3 LED display maintenance checklist, keep this boundary: Follow installed-system documentation and site electrical, structural, access, and anti-static safety rules; qualified personnel must handle hazardous work.
A page-specific closing check should confirm temperature evidence, spare compatibility, and acceptance test while avoiding mixing incompatible spare batches. Keep the note specific enough that another reader can repeat the check without guessing what evidence was used.
Before applying the advice, compare module condition with safety boundary and write down the one result that would change the decision.
A practical example is test-pattern record: it should be tested against the reader task, not treated as a universal answer.
The main boundary remains clear: Follow installed-system documentation and site electrical, structural, access, and anti-static safety rules; qualified personnel must handle hazardous work.
For P3 LED display maintenance checklist, keep the final wording close to the reader task and the visible evidence instead of adding a broad summary.
5. Verify Spare Compatibility and Maintenance Records
Keep one maintenance record beside the cabinet map: note the symptom, cabinet position, module batch, power and signal observations, assigned owner, and the acceptance result. This lets another technician repeat the diagnosis without relying on memory.
A second inspection should compare the observed fault with the installed controller, receiving-card map, module specification, and spare inventory. If the evidence does not match, stop component replacement and escalate the diagnosis.
Separate visual symptoms, electrical measurements, signal-path evidence, and maintenance history. These evidence layers may point to the same component, but conflicting results should remain documented instead of being forced into one diagnosis.
6. Assign an Owner, Impact Level, and Corrective Action
The closing check should confirm stable content playback, uniform brightness and color, acceptable cabinet temperature, secure connections, and no recurring fault indicators. Record the result before returning the display to service.
When this checklist is used in the field, keep each record short and specific: identify the cabinet, state the symptom, attach the measurement or test pattern, and name the next responsible owner.
If a fault remains uncertain, preserve the evidence and isolate the affected area according to site procedure. Do not install an unverified spare or bypass a safety control merely to restore the wall quickly.
7. Run and Record Return-to-Service Acceptance Tests
A final record should compare the original symptom, corrective action, and acceptance test. If all three are clear and the safety boundary is satisfied, the maintenance handoff can proceed without guesswork.
For this P3 display, compare the pre-maintenance symptom, component-level evidence, corrective action, and final test pattern. Record what changed at each stage because repeatable maintenance depends on measured voltage, temperature, signal status, and visible uniformity rather than guesswork.
Return-to-Service Quick reference
Use this quick reference for P3 LED display maintenance checklist: check module condition, compare power and signal path, watch for replacing modules before tracing power and signal, and keep the boundary note visible before choosing a next step.
- Best reader: LED display owners, venue technicians, integrators, and procurement teams
- Strongest evidence check: module condition
- Useful example: cabinet map
- Boundary: Follow installed-system documentation and site electrical, structural, access, and anti-static safety rules; qualified personnel must handle hazardous work.
P3 LED Display Maintenance FAQs
How often should the P3 LED display maintenance checklist be completed?
Start with the central meaning of P3 LED display maintenance checklist, then confirm module condition and power and signal path before using the answer in a real plan.
What should be recorded before replacing a P3 LED module?
The safest check is temperature evidence. It keeps P3 LED display maintenance checklist tied to visible evidence instead of a vague impression.
How can a technician distinguish power, signal, and module faults?
Avoid skipping temperature evidence. That mistake can make P3 LED display maintenance checklist sound clearer than it really is.
Why must spare P3 modules be checked for compatibility?
Use related site pages when you need examples, tools, or a broader background after reading about P3 LED display maintenance checklist.
Which acceptance tests are needed before return to service?
Follow installed-system documentation and site electrical, structural, access, and anti-static safety rules; qualified personnel must handle hazardous work.
Final Thoughts on P3 LED Display Maintenance
A maintenance checklist is useful only when another technician can trace the symptom, evidence, action, owner, and acceptance result. Keep the record with the cabinet map and installed-system documentation so the next inspection starts from verified history rather than guesswork.