Quick answer: To clean an LED screen, first identify the exact direct-view LED product and its approved maintenance procedure. Power it down and isolate it under the site’s rules. For many indoor fine-pitch modules, remove loose dust with a clean soft brush and a controlled vacuum method—without putting liquid on the LED face. Use water or detergent on an outdoor screen only when the manufacturer explicitly permits that method for the installed product.
An LED wall is not a large household television. Its face may contain exposed LED packages, masks, coatings and narrow module seams. A paper towel can snag; a hard brush can damage LEDs or louvers; spray can enter a seam; and high pressure can disturb seals. The correct method depends on whether the wall is indoor or outdoor, front-service or rear-service, coated or uncoated, and still under warranty.
This guide covers routine face cleaning of modular direct-view LED displays. It does not authorize opening cabinets, working on live equipment, reaching from an unsafe ladder or applying a chemical that the product manual does not name. If the screen has moisture inside, burned parts, loose modules or damaged wiring, stop and route the condition to qualified service personnel.
First identify the screen before cleaning
Record the manufacturer, product series, pixel pitch, indoor or outdoor rating, module surface type and installation access. Find the maintenance section of the current manual or obtain written instructions from the integrator. A generic search result cannot replace the installed product’s instructions.
| Installed condition | Reasonable starting method | Do not assume | Stop condition |
|---|---|---|---|
| Indoor fine-pitch screen with exposed modules | Dry, soft brush and product-approved vacuum control | That monitor cleaner or a damp cloth is safe | Loose LEDs, damaged mask, static-control concern or unknown coating |
| Coated COB or GOB-type surface | Follow that surface’s manual; use only listed cloth or cleaner | That every sealed-looking coating accepts alcohol or glass cleaner | Clouding, peeling, softened surface or unknown chemical compatibility |
| Weather-rated outdoor matrix display | Manufacturer-approved soft brush and low-pressure method | That outdoor rating means pressure washing is allowed | Damaged seals, open cabinet, live power or water ingress |
| Rental or touring LED panels | Clean in the designated service area using the rental inventory procedure | That installed-wall methods fit transport hardware and connectors | Bent pins, cracked masks, wet connectors or impact damage |
Photograph the wall before cleaning from the normal viewing distance and from a fixed closer position. Note whether the issue is loose dust, oily residue, module-edge darkening, an isolated dead pixel or a broad brightness difference. Cleaning can remove surface contamination. It cannot repair a failed pixel, differential aging, moisture inside a cabinet or a calibration error.
Tools and stop conditions
Prepare only the materials allowed by the product instructions. For a dry indoor procedure, that commonly means a clean soft-bristle brush, an antistatic work arrangement specified by the site, a vacuum with controlled suction and a nozzle that does not scrape the LED face, lighting for inspection, and clean containers that keep used tools away from the modules.
- Schedule downtime and preserve the current display status before shutdown.
- Have an authorized person power down and isolate the display under the site procedure.
- Let hot equipment cool before touching the face.
- Protect the floor and establish a work zone so nobody restarts the wall or walks beneath elevated work.
- Use approved access equipment; do not lean a ladder against the display.
- Stop if a module is loose, a cabinet is open, insulation is damaged, or moisture is visible where it should not be.
Electrical boundary: Turning content black is not the same as isolating electrical power. Cleaning instructions do not replace the site’s lockout, access, fall-protection or electrical-safety procedure.
How to clean an indoor fine-pitch LED screen
The Absen K V3 indoor fine-pitch manual recommends regular cleaning when dust accumulates, using a soft brush and vacuum to remove dust, and not using liquid on the LED module surface. That is a product-specific instruction, but it illustrates the safest default when an exposed indoor module has no approved wet method.
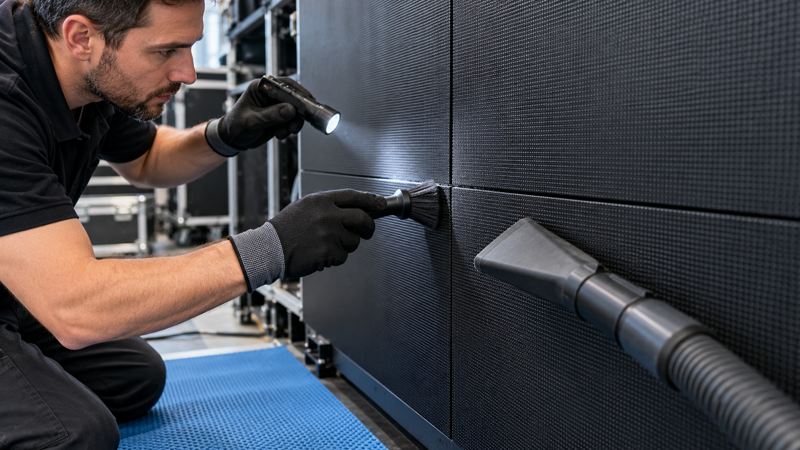
- Inspect before contact. Use angled light to find loose particles, fingerprints, sticky contamination, damaged masks and protruding components.
- Test the tool away from the screen. Confirm that the brush is clean, soft and not shedding. Set the vacuum to a controlled level and keep the nozzle from touching LEDs.
- Work top to bottom. Use light, consistent brush strokes so dislodged dust moves toward an area that has not yet been cleaned.
- Control the dust. Hold the approved vacuum near the brush path without dragging it over the module face or pulling on an LED package.
- Clean module seams gently. Do not push a brush, cloth or nozzle into a gap. Follow the seam direction and avoid hooks or sharp tools.
- Inspect each completed zone. Check for remaining dust, tool marks, loose components and any change in the module face.
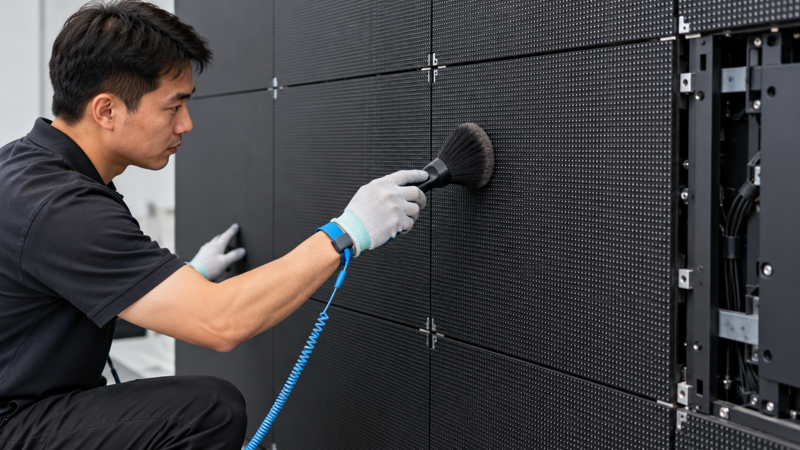
Inspect the module face and seams
Fine-pitch LEDs are vulnerable to force concentrated on a small point. A cloth that seems soft can catch on a protruding package or push contamination into a seam. Keep the process slow enough to see what the tool is doing. If residue remains after the approved dry method, do not improvise with alcohol, glass cleaner or a damp cloth. Record the area and ask the manufacturer which surface method is compatible.
Compressed air is also not an automatic substitute. A jet can drive dust into seams, move loose particles across the face or create static and condensation concerns depending on the equipment. Use it only when the product and site procedures specifically allow it.
How outdoor cleaning differs
A weather-rated outdoor screen may have a manufacturer-approved wet-cleaning procedure, but the rating alone does not authorize one. Daktronics’ LED Matrix Display Face Cleaning Quick Guide explicitly separates outdoor and indoor methods. Its outdoor procedure uses power-off conditions, a soft automotive-style brush, specified cleaning materials and relatively soft water. It warns against stiff deck brushes, residue-forming products and power washers because pressure or abrasion can damage LEDs and louvers.
- Confirm the exact model, current manual revision, water quality, cleaner and dilution.
- Inspect seals, louvers, cabinet doors and damaged modules before any water reaches the face.
- Isolate power and establish the access and drainage plan.
- Apply the approved solution with the specified soft brush, working in the direction and sequence stated by the manufacturer.
- Use only the permitted rinse pressure and keep water away from open cabinets, connectors and damaged seals.
- Allow the assembly to drain and dry as instructed before the authorized restart.
Elevated cleaning adds fall protection, lift operation, exclusion zones and weather conditions to the job. Route that work to trained personnel. If dirt causes a recurring grid pattern or dark module edges, record whether the pattern follows a module. Daktronics notes that buildup can make a display look dull or produce dark lines near module perimeters; severe or persistent cases may need specialized cleaning rather than more force.
Mistakes that damage LED modules
- Spraying without manufacturer approval. Use only a wet-cleaning method, pressure, nozzle, angle and product explicitly allowed for the exact installed model. Some outdoor procedures permit a controlled rinse; improvised direct spraying can force liquid into seams, connectors or open cabinets.
- Using paper towels, stiff brushes or scrubbing pads. Abrasion can mark coatings, masks, louvers or LED packages.
- Copying a TV-cleaning recipe. A household LCD or OLED panel has a different surface and construction from direct-view LED modules.
- Pressure washing because the display is outdoors. High pressure can damage LEDs, louvers and sealing details unless a product-specific procedure states otherwise.
- Cleaning while powered. A black image is not electrical isolation, and wet or conductive contamination adds risk.
- Trying to clean away a pixel fault. Repeated rubbing adds damage while leaving the real electronic or calibration issue unresolved.
When a remaining spot looks like a pixel or module fault, stop cleaning and document the symptom. If a faint fixed outline remains across changing content, compare it with the LED display burn-in and uneven-aging guide instead of cleaning the same area repeatedly.
Verify the result before restoring service
- Inspect the powered-off face for moisture, loose components, residue and tool marks.
- Confirm that brushes, cloths, covers, lifts and barriers have been removed from the display and service area.
- Have the authorized person restore power under the site procedure.
- Show normal content plus supported black, gray, red, green, blue and white fields if the manufacturer allows them.
- Compare the same camera position and viewing distance used before cleaning.
- Record what improved, what remained and whether any module needs service.
A visually cleaner wall is not proof that every module is healthy. Check uniformity, dead or stuck pixels and module boundaries separately. If the screen behaves abnormally after cleaning, power it down according to the site procedure and escalate with photographs and the cleaning record.
Build a condition-based cleaning record
Do not invent one cleaning interval for every installation. A lobby screen behind a barrier, a dusty production floor, a touring wall and a roadside display accumulate different contamination. Inspect on a defined cadence, then clean when evidence and the product procedure justify it.
Log the date, observed contamination, affected zones, product manual revision, tools and materials used, personnel, before-and-after photos, operating conditions and any unresolved defects. Over time, the record can reveal whether nearby construction, ventilation, audience contact or weather exposure is creating a repeat problem.
Questions about cleaning an LED screen
Can I use screen cleaner on an LED wall?
Only if the installed product’s manufacturer explicitly approves that cleaner and application method. Many exposed indoor fine-pitch modules are cleaned dry, and spraying liquid directly on the face is not a safe universal method.
Can I vacuum an LED screen?
Some product guidance allows controlled vacuum dust removal, but the nozzle should not scrape or pull on LED packages. Use the suction level, distance, static control and tool specified for the installed screen.
Can an outdoor LED screen be pressure washed?
Do not assume so. Daktronics’ general face-cleaning guide warns against power washers. Follow the exact model’s current instructions and use trained personnel for elevated wet cleaning.
How often should an LED screen be cleaned?
Use a condition-based schedule informed by the environment, viewing quality and manufacturer guidance. Inspect regularly and clean when contamination is documented; unnecessary contact also creates risk.
Sources and limits
Product guidance checked October 30, 2026: the Absen K V3 Series user manual for indoor fine-pitch dry cleaning, the Daktronics LED Matrix Display Face Cleaning Quick Guide for separated indoor and outdoor methods, and the Daktronics support note on identifying buildup and choosing a cleaning level. These references do not make one vendor’s procedure universal. The installed product manual, warranty, site safety plan and qualified service provider take priority.